Installation
How to Install a Spill Diaper: Orientation and Attachment Checks
Use the correct layer orientation and inspect all four built-in corner bungees before relying on the setup.

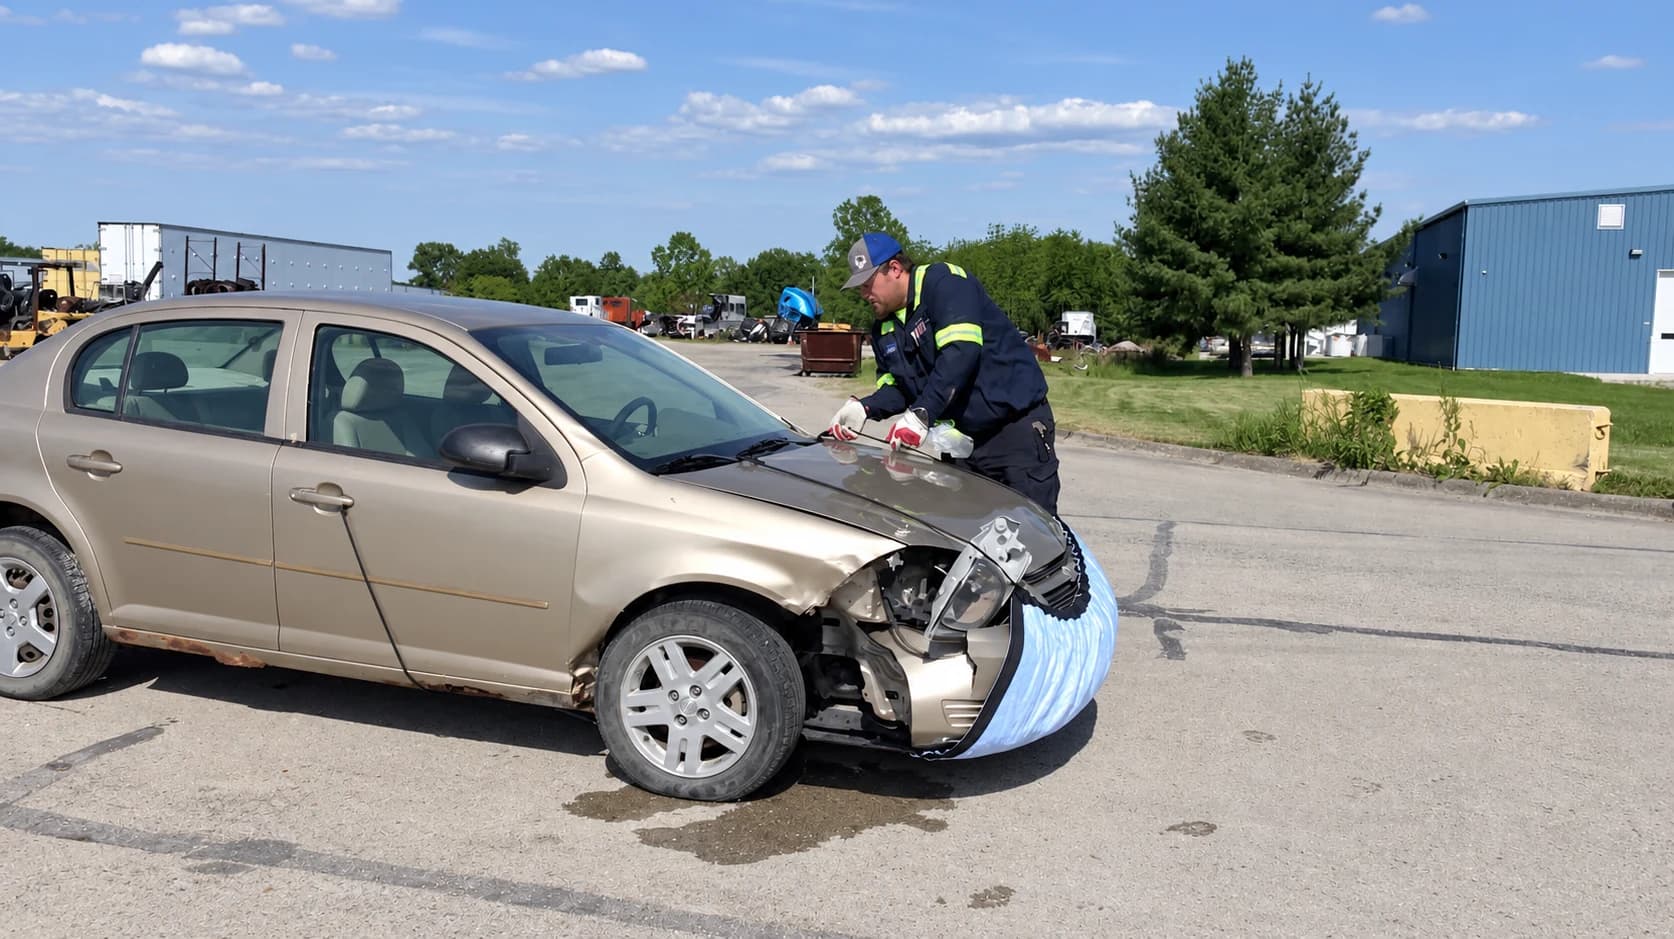
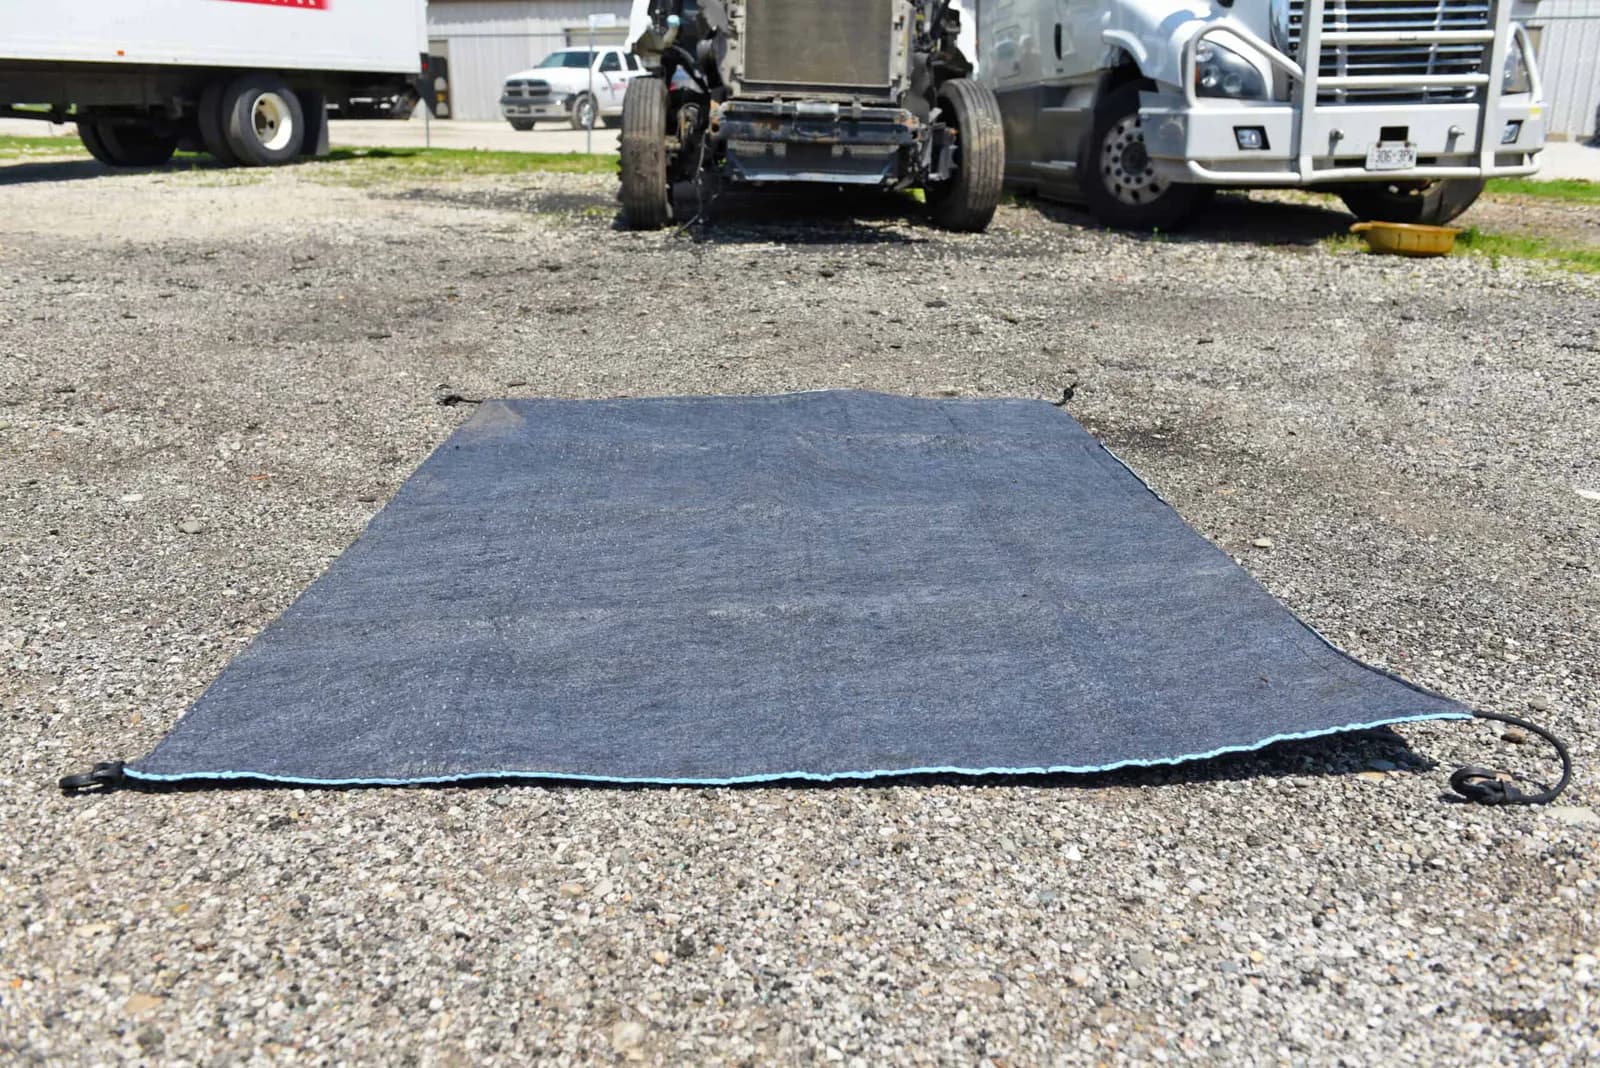
Correct Spill Diaper installation starts before the first hook is attached. Open the product enough to identify the dark absorbent face, the light-blue plastic barrier, the continuous black binding, and all four corners. The dark side faces the leak. The blue side faces down or outward, where it forms the last barrier between captured fluid and the surface below.
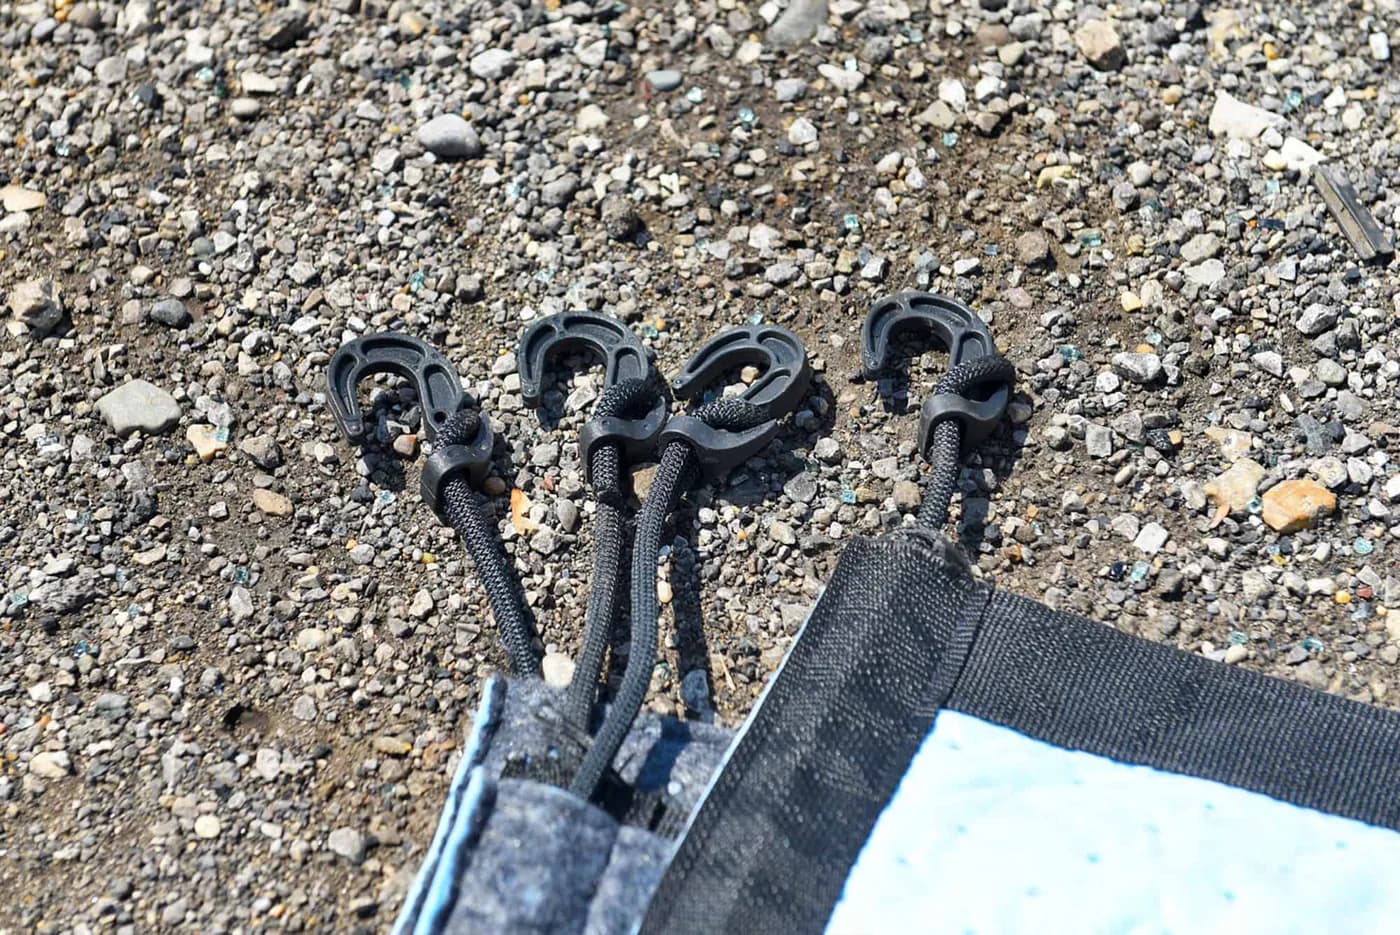
Each corner has one built-in bungee cord, and every cord ends in one black plastic open hook. The cords do not meet at a center fitting and they do not branch. Position the flexible center beneath the expected drip path first, then connect the four corners to separate secure points that keep the product clear of tires, moving parts, hot components, sharp edges, rigging, and the rollback mechanism.
- 01
Open the mat
Unfold it completely with the gray absorbent surface facing the leak.
- 02
Cover the drip path
Center the flexible section beneath the leaking component.
- 03
Secure each corner
Clip every free-end hook to its own solid point on the vehicle.
- 04
Check the fit
Keep the mat and cords clear of tires, hot exhaust, and moving parts.
Four-corner setup
Position the mat before adding tension
- 01
Open
Find the dark face, blue barrier, and four corners.
- 02
Center
Place the flexible middle beneath the drip path.
- 03
Hook
Connect one separate cord from every corner.
- 04
Recheck
Confirm coverage and clearance after movement.
Orient the three layers correctly
The manufacturer identifies the dark gray or black surface as the absorbent face and states that the blue side faces down. On a damaged front end, the blue barrier may become the most visible exterior because the mat wraps upward around the vehicle.
Open the product fully enough to identify every corner. Confirm that there are four bungees total, one attached at each corner, and that each cord has its black plastic hook.
The layer orientation matters because the two absorbent layers and the plastic barrier have different jobs. The general-absorbent surface receives antifreeze, acids, and other compatible fluid. The thicker oil-only middle targets oil, gasoline, diesel, and hydrocarbons. The blue 4-mil plastic layer belongs on the outside or bottom. If the blue side faces the leak, the absorbent material cannot contact the fluid as designed.
Position before tensioning
The official video shows the mat laid dark-side up and moved beneath the target area before the hooks are placed. Keep the mat clear of unsafe hot, sharp, or moving parts and do not assume that a point is suitable merely because a hook can reach it.
Move the mat into place while the cords are still relaxed. Center its widest useful area beneath the suspected source and allow enough depth for the product to form a cradle without touching the ground, wheels, or recovery equipment. On a damaged front end, the mat may wrap upward around missing bodywork. Around equipment, the same flexible shape can hang beneath a hydraulic or engine area when safe points are available.
- Dark absorbent face toward the leak.
- Blue barrier facing down or outward.
- One bungee and one hook at each of four corners.
- Coverage beneath the likely drip path.
- Cord routes clear of hazards and interference.
Inspect the finished cradle
The installed shape should collect toward the center without pulling the mat away from the source. Recheck attachment, clearance, tension, and the fluid level as the vehicle moves or conditions change. The manufacturer's video demonstrates possible placement, but it does not approve every vehicle point.
Tension should hold the mat close to the source without stretching the binding or pulling one corner out of alignment. Trace every cord from its product corner to its hook and attachment point. A final visual count should produce four corners, four separate cords, and four hooks. Recheck the installed shape whenever the vehicle angle changes because loading, winching, and unloading can redirect the drip path.
Choose attachment points that survive the next movement
A reachable hole or edge is not automatically a suitable attachment point. Look for a stable part of the vehicle or equipment that will not move, heat up, cut the cord, or interfere with recovery. Keep cords away from suspension travel, steering, rotating assemblies, exhaust components, winch lines, tie-downs, and the path of the rollback bed. If one corner cannot be routed safely, reposition the mat before creating tension.
The official installation footage shows the operator changing an attachment point when the first choice does not hold the desired position. That is a normal part of setup. The goal is a centered, supported cradle under the leak, not the shortest possible cord route. Check the geometry from more than one side before the vehicle moves or the operator leaves it in storage.
Monitor the installed product
Installation is complete only when someone owns the next inspection. Note the fluid if known, the likely rate, the location of the low point, and the condition that will trigger replacement or escalation. A slow drip under a parked vehicle and an active leak during recovery require different inspection intervals even when the same product is used.
After transport, inspect the cords, hooks, binding, and accumulated fluid before unloading. The mat may have shifted as the vehicle angle changed. Correct the setup before moving the vehicle into a yard or repair bay, then pass the leak information and inspection status to the receiving person. That handoff keeps the containment plan attached to the job instead of depending on memory.
Frequently asked questions
Questions this guide answers
Which side of the Spill Diaper faces the leak?
The dark gray or black absorbent side faces the leak. The light-blue plastic barrier faces down or outward.
How many bungee cords are attached to the product?
There are four built-in bungees total, one at each corner. Each cord has one black plastic open hook.
Can the Spill Diaper stay attached while a vehicle is moved?
It is designed as flexible attachable containment, but the crew must verify safe points, clearance, cord routing, and the installed shape before and during movement.